
Like with many things I do it started “with I wonder if…” I can monitor my internet connection with Zabbix and Grafana.
Well I have managed to figure out the first part and I now have data about my internet connection flowing into Zabbix.
I first started off by searching for existing templates in Zabbix Share
https://share.zabbix.com/search-by/tags?value=speedtest
Unfortunately all of them were broken as far as I could tell. After pocking around a bit I eventually I settled on this one. since it was only half broken. So I set about rewriting most of the script and adding a check for connectivity by pinging 8.8.8.8.
You can download the script and template here
If you want to set this up yourself follow the instructions below.
- Install SpeedTest CLI (note speedtest.net has its own which uses different switches it will not work with this script.)
sudo apt-get install speedtest-cli
2. Run speedtest-cli
root@monitor:/home/administrator# speedtest-cli

Retrieving speedtest.net configuration...

Testing from MY ISP (NNN.NNN.NNN.NNN)...

Retrieving speedtest.net server list...

Selecting best server based on ping...

Hosted by S&T Communications (Colby, KS) [2046.18 km]: 40.067 ms

Testing download speed................................................................................

Download: 262.24 Mbit/s

Testing upload speed......................................................................................................

Upload: 4.04 Mbit/s
if you get something similar to above great its working!
3. Create a folder for the script to live in.
sudo mkdir /etc/zabbix/script
4. Give it permissions
sudo chmod 777 /etc/zabbix/script
5. Copy the script over. This can either be done from the command line or with a utility such as WinSCP
6. Make the script executable
sudo chmod +x /etc/zabbix/script/spd.sh
7. Now that we have the script setup we need to process the data it is getting back from speedtest-cli. In the case of my version of this script its using JSON. If this is not already installed run the command below.
sudo apt-get install js
8. Next we need to be able to send the data to Zabbix. This will require installing Zabbix_send (note Zabbix send is not installed by default on monitored hosts.)
sudo apt-get install zabbix_send
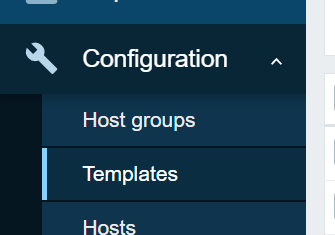
9. Now that we can send the data to Zabbix we will need a template setup so Zabbix knows what to do with it. Sign into your Zabbix webadmin then click Configuration >> Templates
Click Import in the upper Right Hand corner

select the file to import
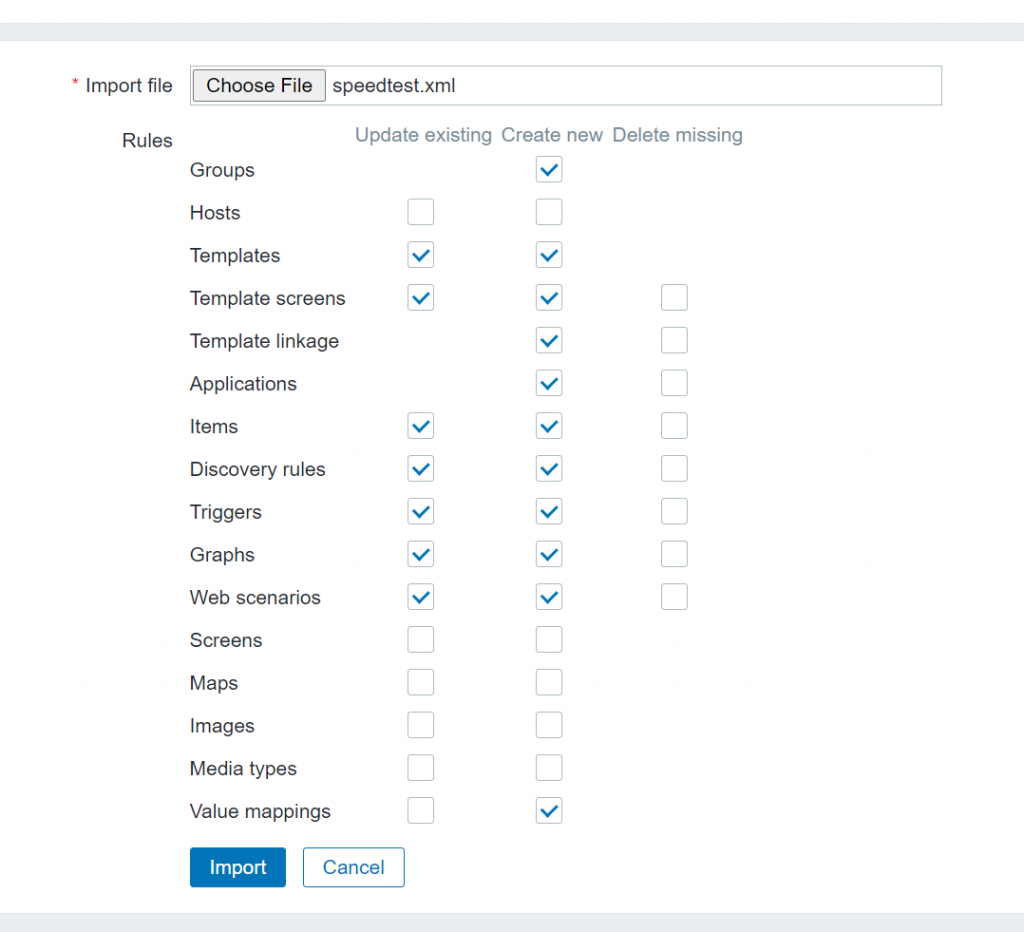
Then Click Import.
Next we will need to link it to the appropriate machine.
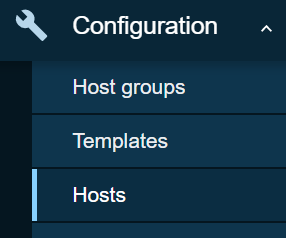
Click Hosts under Configuration

click the link for the device you setup the script on.

click the templates tab

click select

check speedtest

click select
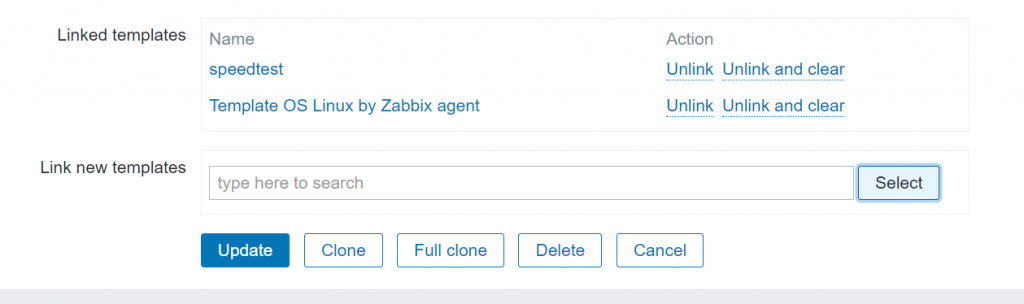
confirm the linked templates then click update
10. With the Zabbix template now setup we can test the script.
/bin/bash /etc/zabbix/script/spd.sh
you should have something similar to below
checking speedtest and report back to zabbix, please wait...

info from server: "processed: 8; failed: 0; total: 8; seconds spent: 0.000489"

sent: 8; skipped: 0; total: 8

root@monitor:/home/administrator#
If something shows failed check the above steps to see if you missed anything.
11. Finally we need to schedule a couple tasks so this script runs.
to schedule a task you will need to run crontab
crontab -e
If this is the first time it will prompt you to select an editor
no crontab for administrator - using an empty one


Select an editor.  To change later, run 'select-editor'.

  1. /bin/nano        <---- easiest

  2. /usr/bin/vim.basic

  3. /usr/bin/vim.tiny

  4. /bin/ed


Choose 1-4 [1]:
Pick your editor. I used nano. Enter the following lines at the end of the file then save.
*/20 * * * * /bin/bash /etc/zabbix/script/spd.sh # runs every 20 minites

0 3 * * * find  /tmp/*.log -ctime +1 -exec rm {} \; # runs daily at 3 AM
If you don’t like the intervals I have set above a good place to generate the cron timings is here.
12. Finished
If everything worked You should be getting data pushed to Zabbix every 20 minutes ($:00, $:20, $:40)
Hi
It seems great, but there’s no “js”package on Debian. Do you know which package to use, I can’t find it !
Thanx
Its a typo it should be jq.
I have followed exactly the same setup as you created but iam getting this error
checking speedtest and report back to zabbix, please wait…
Response from “192.168.128.130:10051”: “processed: 0; failed: 8; total: 8; seconds spent: 0.000161”
sent: 8; skipped: 0; total: 8
——————
I have changed zabbix server ip and hostname for my server
#################
# Zabbix
TIMESTAMP=$(date “+%Y.%m.%d-%H.%M.%S”)
ZABBIX_SENDER=”/usr/bin/zabbix_sender”
ZABBIX_HOST=”suv.netstlab.com” #fully qualified name
ZABBIX_SRV=”192.168.128.130″ # IP address of zabbix
ZABBIX_LOG=”/dev/null”
The script unfortunately broke a few months back and I haven’t had time to fix it. I am planning on rewriting it sometime in January.
Hi there Robyn, did you ever get time to fix/upgrade this script? This would be an invaluable tool to have, however I’m a Zabbix & bash n00b and do not know enough to resolve it myself.
Many thanks
Any update on this, I’m getting failed response as previous poster when doing “ /bin/bash /etc/zabbix/script/spd.sh”
Also zabbix_send doesn’t seem to exist.
Had to use zabbix-sender which downloaded
Ok so I managed to get this to work, if I manually enter “/bin/bash /etc/zabbix/script/spd.sh” it outputs to zabbix.
However I have this in cron as per instruction:
*/20 * * * * /bin/bash /etc/zabbix/script/spd.sh
# runs every 20 minites
0 3 * * * find /tmp/*.log -ctime +1 -exec rm {} \;
# runs daily at 3 AM
This doesn’t seem to run. It’s saved in my crontab.
What am I doing wrong? Ubuntu 22.04.
At some point I need to rewrite this unfortunately this is going to be part of a major upgrade that I just don’t have time for at the moment. I suspect a number of parts of this is wrong due to changes in Zabbix I’m still running v5 and I think they are now up to v7 so chunks of this may have been deprecated.