I Am currently in the midst of a hardware refresh and several architecture changes to my network so have been keeping an eye on DELL Refurbished for some good deals. Recently I saw these WYSE thin clients they were clearing out. After a bit of research I found they could run Linux natively, so I bought a couple. My intent was to replace the Android TV I currently use to display my Grafana dashboards with this device running Raspberry PI. Why not use an actual Raspberry PI? I don’t trust running OS’s directly off of SD cards and these thin clients include a 32gig m.2 card which should last a fair amount of time.
Note: My particular devices did not come with a BIOS password set but a number of articles I consulted said they are routinely set to “Fireport’
At Boot you are going to want to spam the F12 key to get into the boot menu. From there you can get into the bios. One thing of note is this device is UEFI only. If you decide to use a different OS on here make sure it can run in UEFI mode as legacy cannot be enabled in this BIOS.
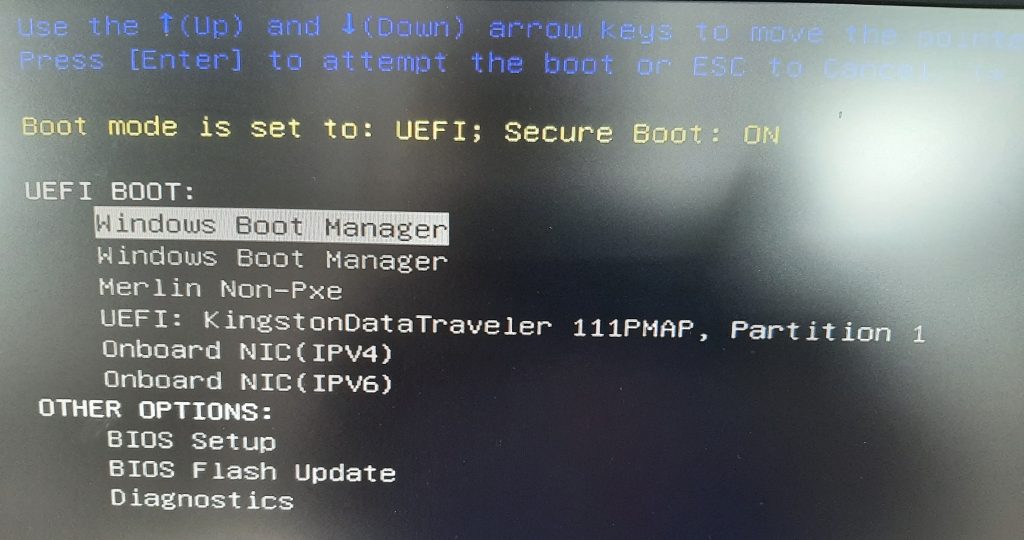
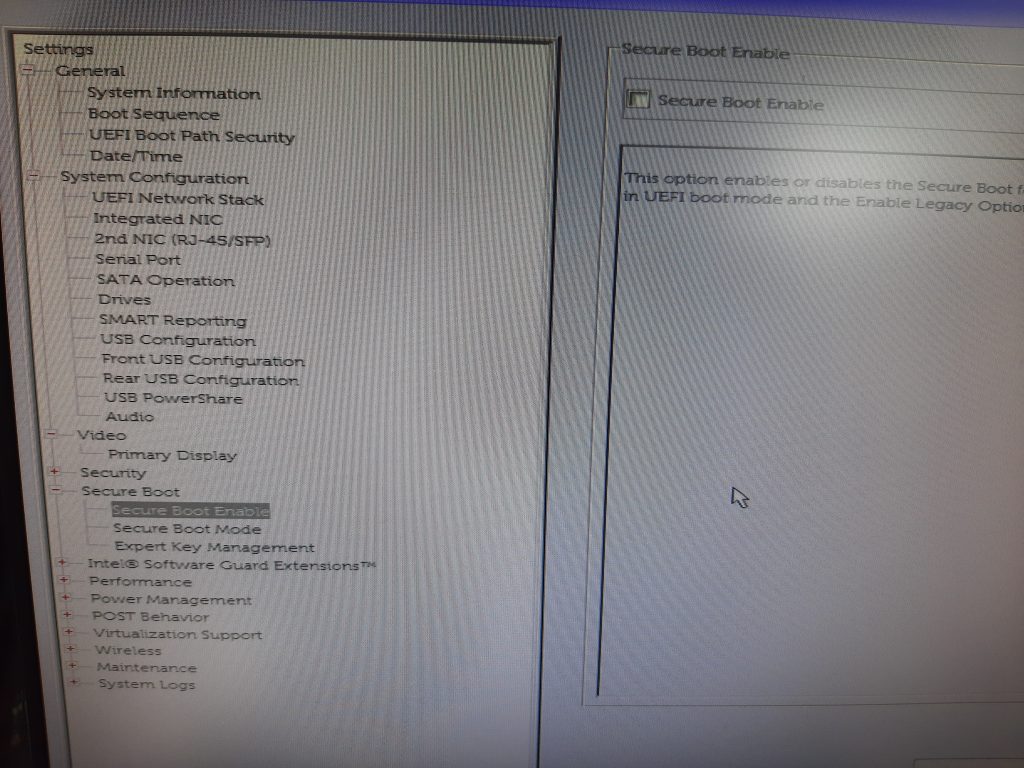
once you are in the bios we will want to turn OFF secure boot.
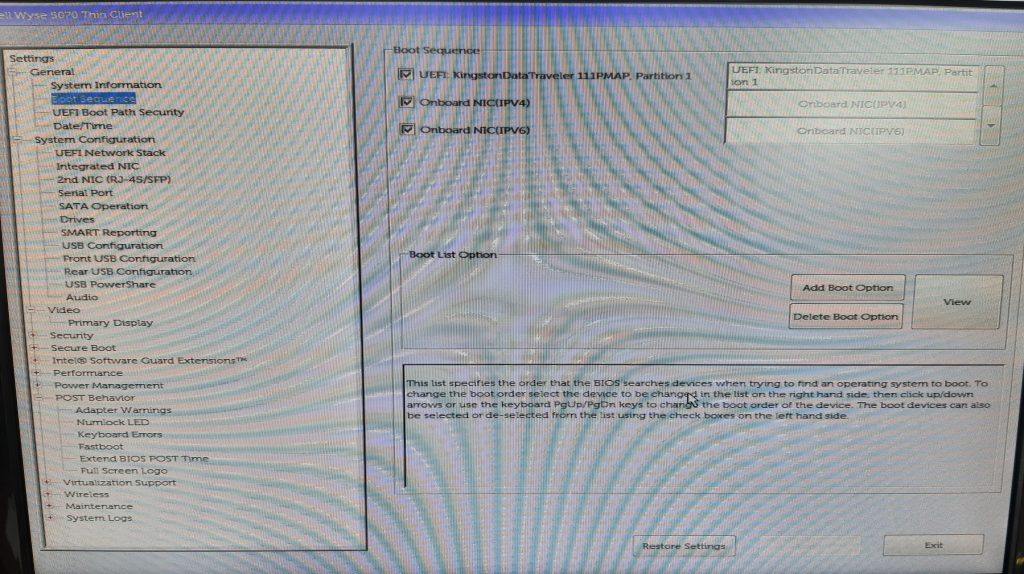
Optional: I decided to clean up the boot sequence order and removed the existing entries
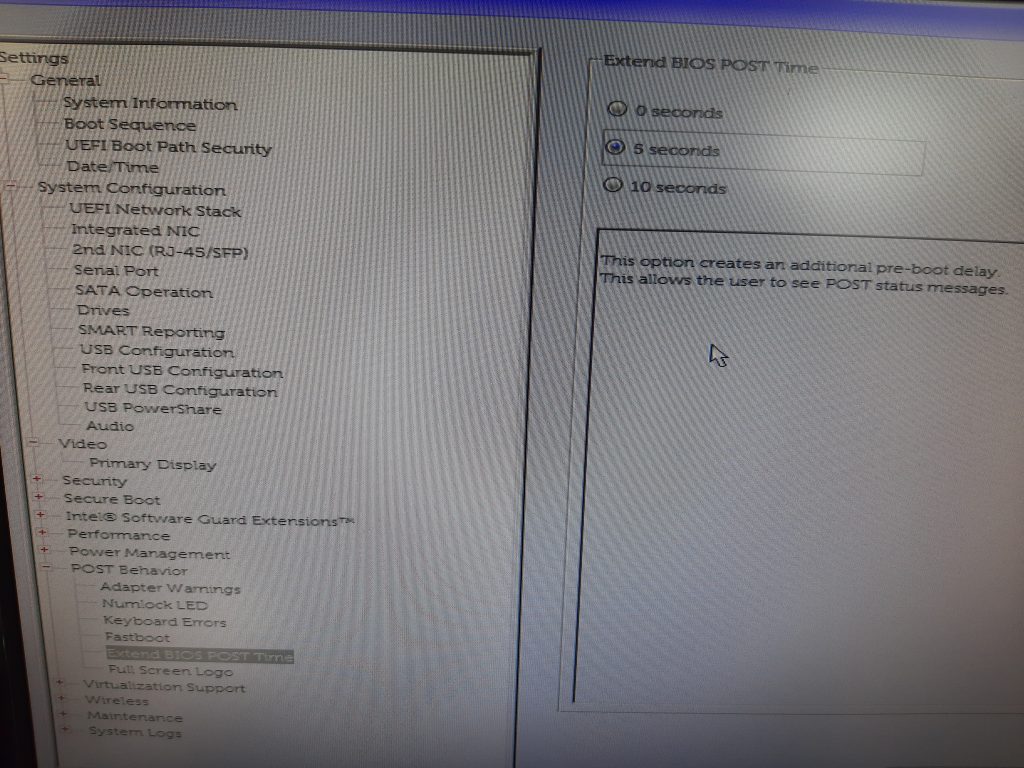
Optional: I also decided to change the post time to 5 seconds to make it easier to get into the Bios if I need to in the future
Once you have made your changes in the BIOS click Apply Setting then exit the BIOS setup.
Prepare a thumb drive with PiOS for PC the ISO can be found here
Download Raspberry Pi Desktop for PC
I am using RUFUS to build mine. Take note you will need to change the Partition Scheme to GPT and Target system to UEFI
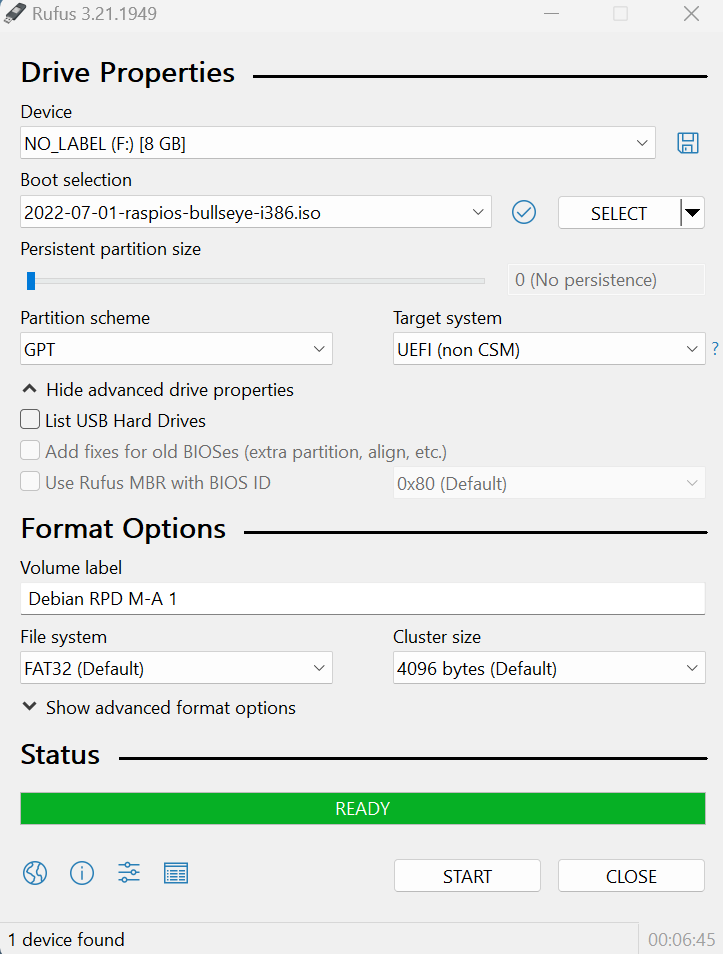
Click start and OK to the warning message that you are going to be erasing the drive.
Once you have the Thumb Drive prepared plug it into your machine and boot from it. (it should be the only bootable device so should start immediately)
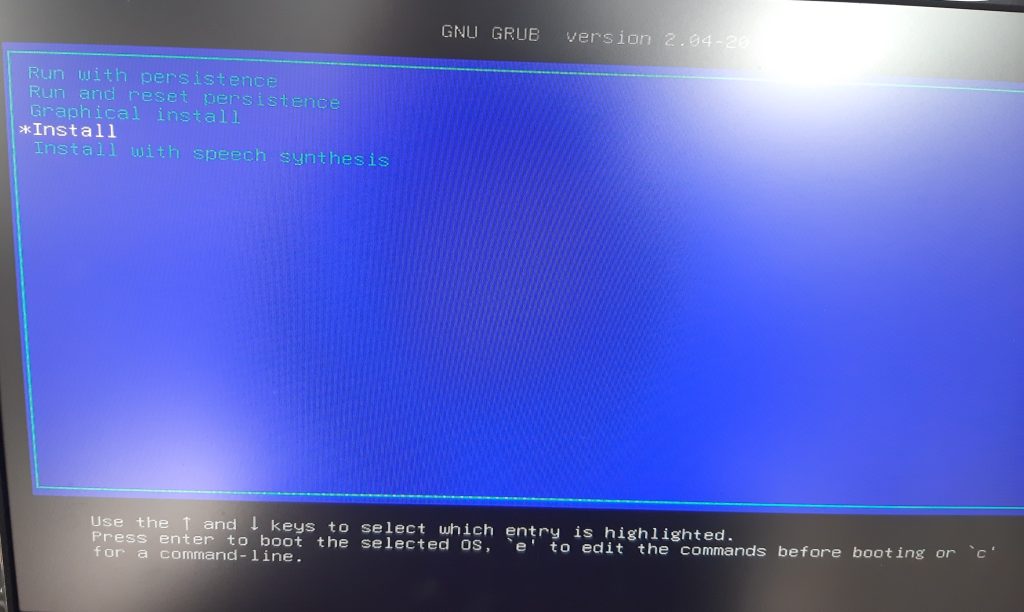
Select Install then click enter
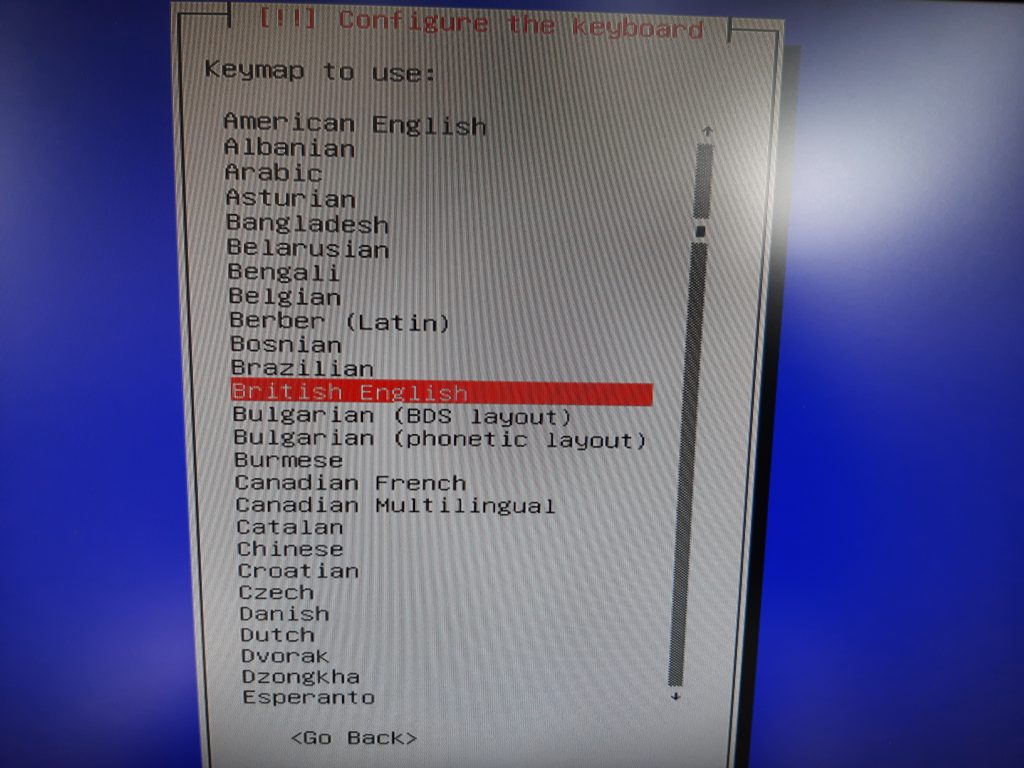
Select your language and click enter
select Yes then click enter
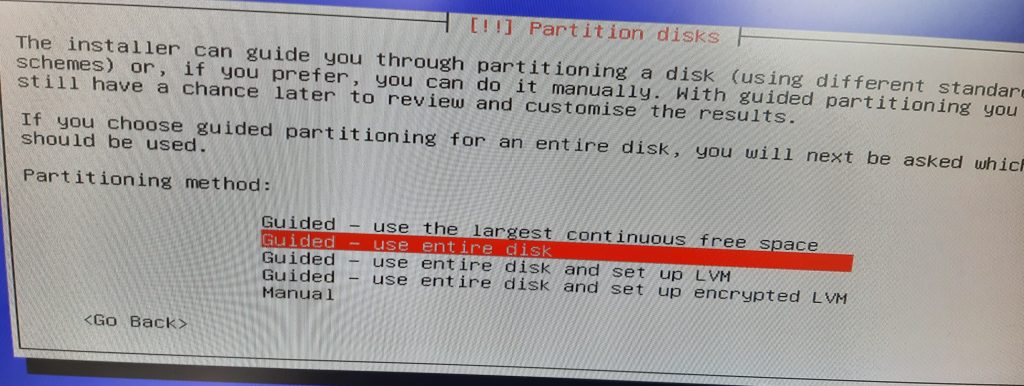
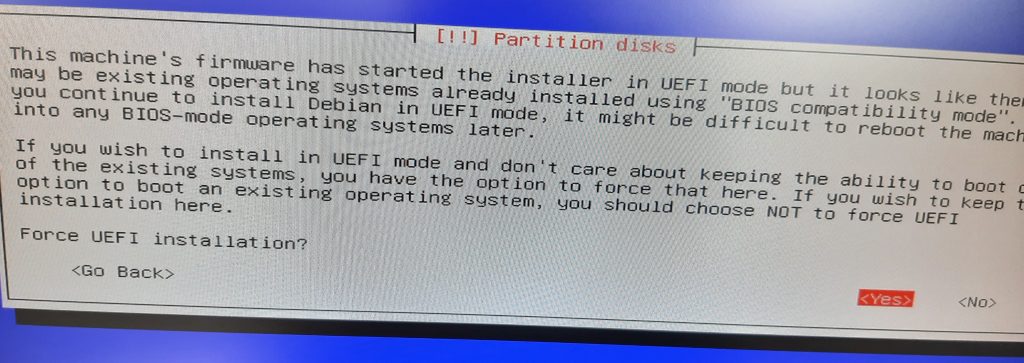
select use entire disk then click enter
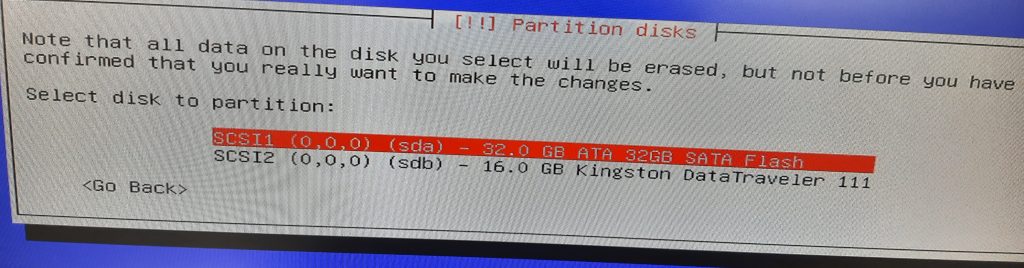
Select your drive then click enter
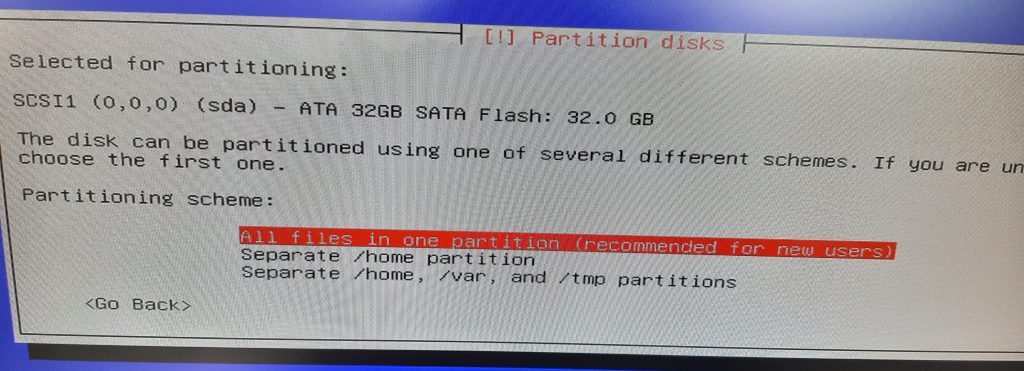
select all files in one partition then click enter
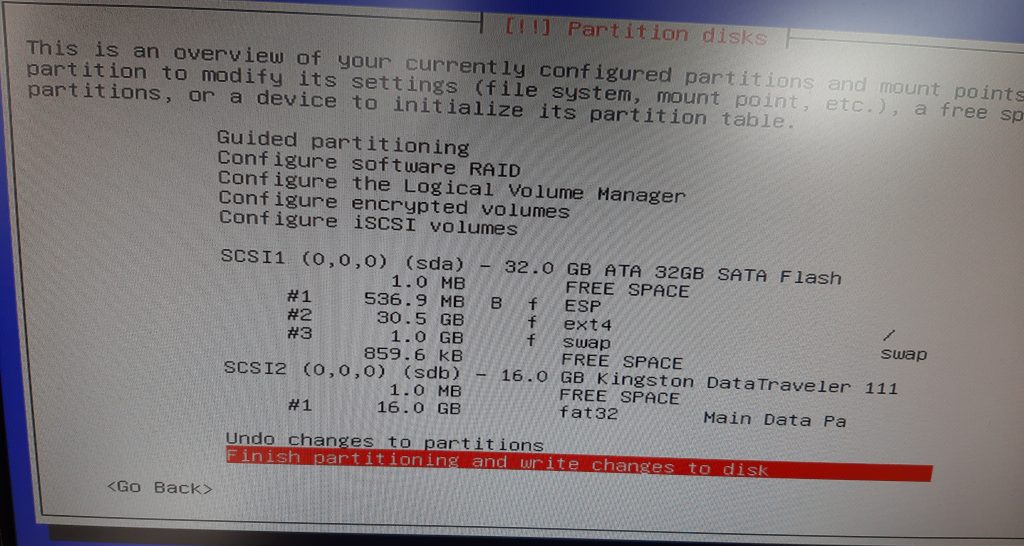
confirm your setting then click enter
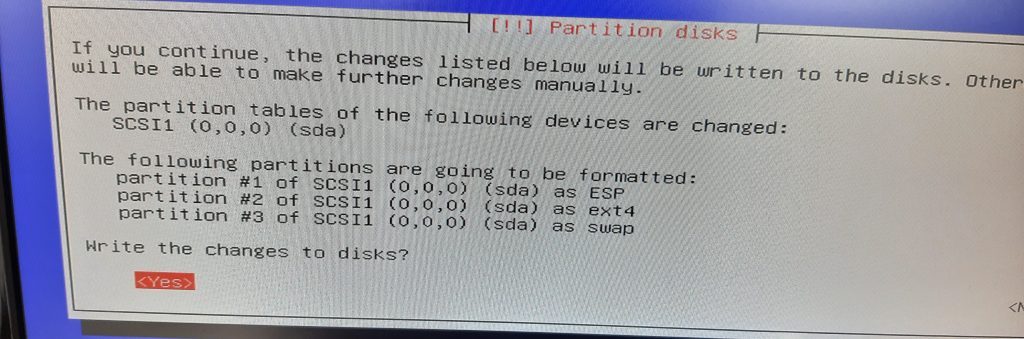
select Yes to write the changes and click enter
The PiOS will now install this will take a bit go make a cup of tea.
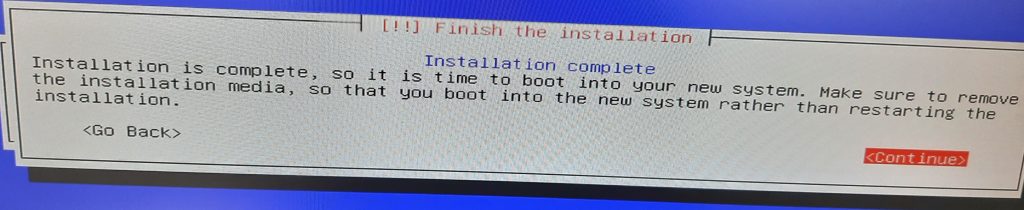
You will see the above screen once installation is complete click enter and remove your thumb drive. The installer will do some clean-up then reboot the machine. Do not power off.
At this point I ran into a problem as for some reason Linux did not like my display port to VGA adapter I have on my test bench so I had to connect to a different display.
once booted you will be presented with the Raspbery Pi setup screen
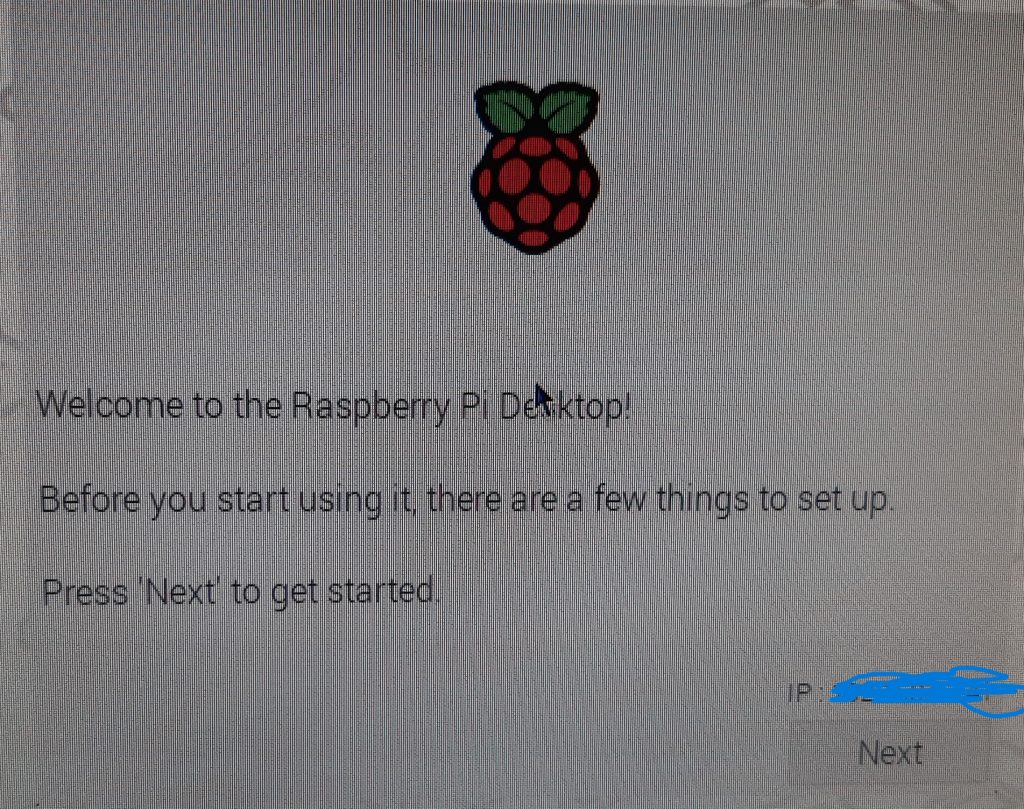
click next
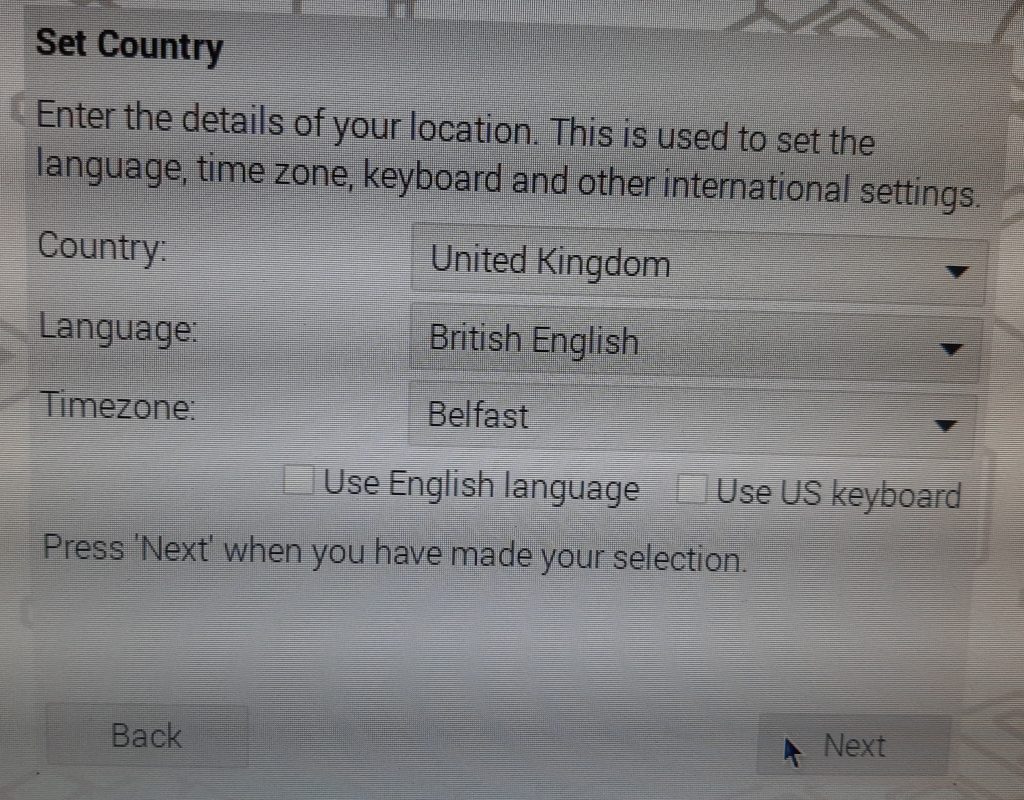
select your country and language
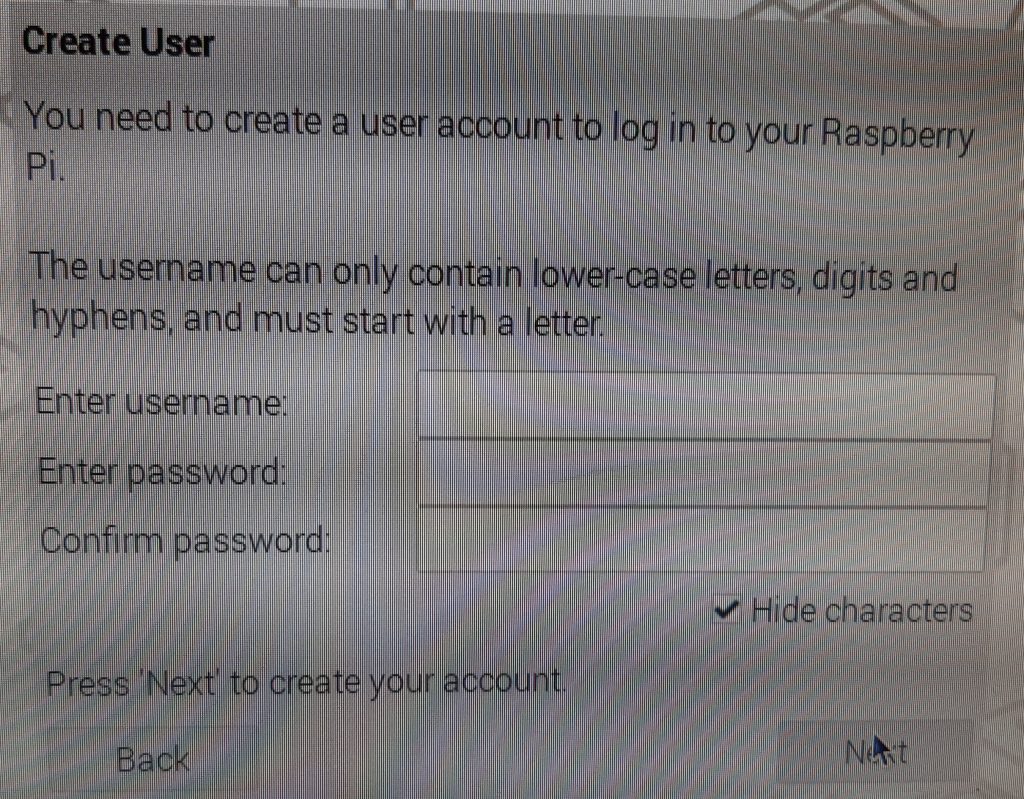
select your username and password in my case I typed piboard for my username. Click next
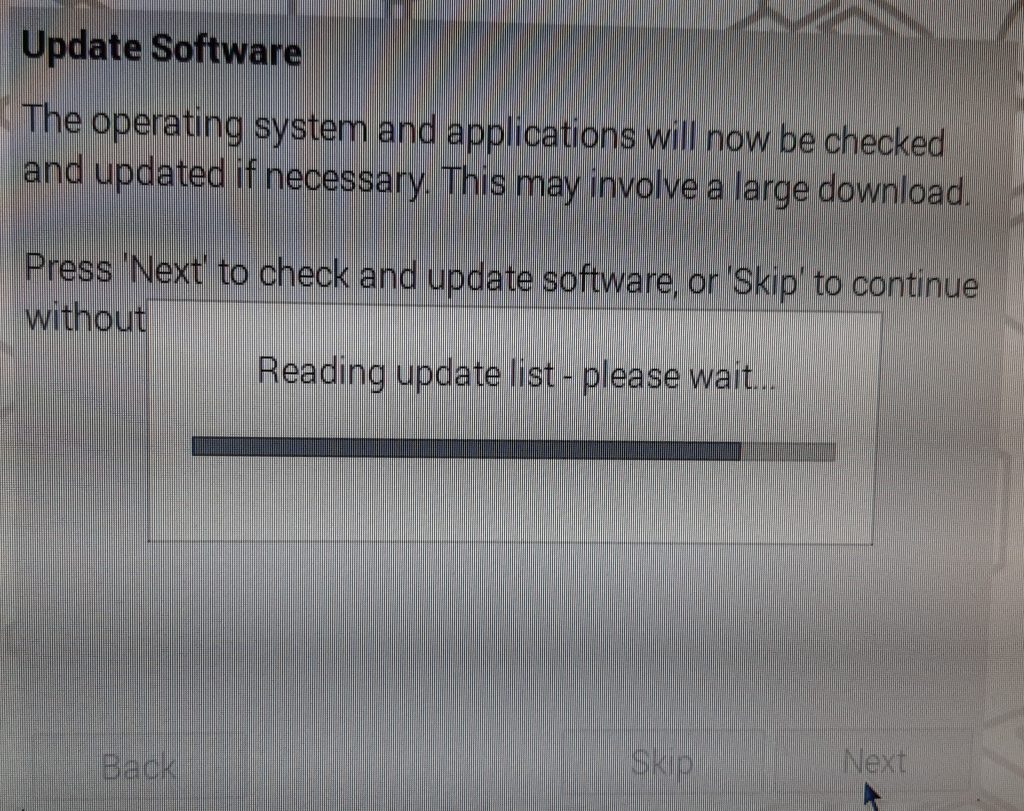
You will then be prompted to update your software. I highly recommend doing this so click next and go have another cup of tea.
once it finishes updating click OK then restart.
Once PiOS starts we need to configure a few settings
click the raspberry >> then click preferences >> then click Raspberry Pi Configuration.
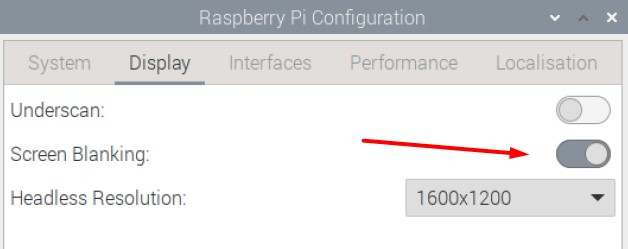
turn off Screen Blanking. Screen blanking will turn off the display output after a period of inactivity. This would make our screen useless.
you will want to also turn on SSH so that you can remotely configure the unit
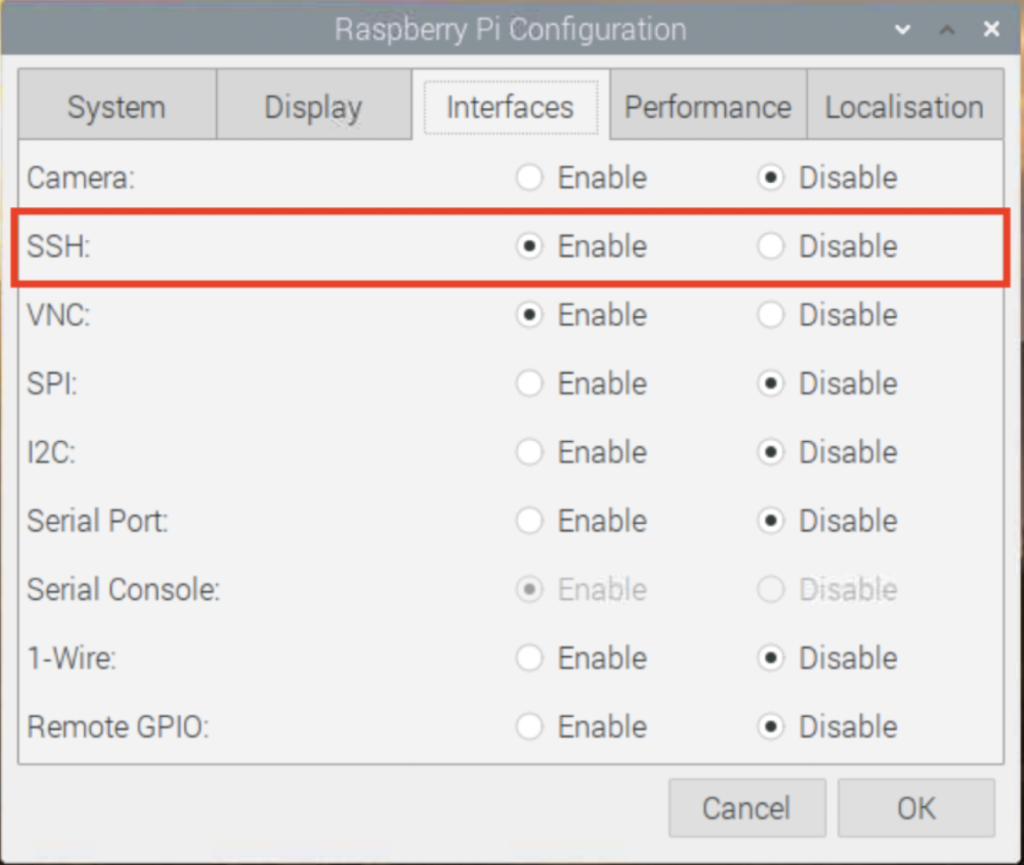
click on interfaces and enable SSH (your view will look slightly different as I borrowed this screenshot from elsewhere) the only option that should show is SSH
once enabled click yes to reboot.
upon rebooting you should be able to remotely connect to your device.
In my case I will be using Putty to configure from my main desktop. these same commands can also be run from the machine via terminal if you chose to.
Next we are going to want to download the Grafana kiosk from github Releases · grafana/grafana-kiosk (github.com) extract it then delete the archive. I would recommend checking what the latest version is but note the commands could possibly chance so check the github doc.
wget https://github.com/grafana/grafana-kiosk/releases/download/v1.0.7/grafana-kiosk-v1.0.7.zip

unzip grafana-kiosk-v1.0.7.zip

rm grafana-kiosk-v1.0.7.zip
because we are using a PC the one we want to use is grafana-kiosk.linux.amd64 but first we need to make it executable. move to the directory you have extracted the file to and run the following command
sudo chmod 755 grafana-kiosk.linux.amd64
at this point you can now test it by running the application. this will show the default demo dashboard from Grafana on your screen
./grafana-kiosk.linux.amd64
to exit click CTRL + C
I tried several ways to get the dashboards to load automatically but the easiest way was to configure was to launch it at start-up as a service.
sudo touch /etc/systemd/system/grafana-kiosk.service

sudo chmod 600 /etc/systemd/system/grafana-kiosk.service
Run the above commands to setup the service
then update the config with nano
sudo nano /etc/systemd/system/grafana-kiosk.service
in nano type the following
Note: the following need to be updated with your own information
- piboard – update with the username you setup for your raspberry pi
- localserver – update with the hostname or IP address of your server hosting grafana
- username – username that can access your dashboards on grafana
- password – your Grafana password
[Unit]

Description=Grafana Kiosk

Documentation=https://github.com/grafana/grafana-kiosk

Documentation=https://hardwarelobby.com/?p=141

After=network.target


[Service]

User=piboard

Environment="DISPLAY=:0"

Environment="XAUTHORITY=/home/piboard/.Xauthority"

ExecStartPre=/bin/sleep 30

ExecStart=/home/piboard/grafana/grafana-kiosk.linux.amd64 -URL=http://localserver:3000/playlists/play/1 -login-method=local -username=username-password=password-kiosk-mode=full>


[Install]

WantedBy=graphical.target
now if you reload systemd your grafana dashboard should load
sudo systemctl daemon-reload

sudo systemctl enable grafana-kiosk

sudo systemctl start grafana-kiosk

sudo systemctl status grafana-kiosk
If you go and check your screen your browser should have opened and your Grafana dashboard should be loaded in full screen.
Once you verify its running I would recommend doing a sudo reboot to restart your device and confirm it loads at boot. You will have to wait about 30 seconds after the desktop loads for the browser to open and load Grafana.
Refrences
Always-on Grafana dashboard using Raspberry Pi touchscreen | Logan Marchione
GitHub – grafana/grafana-kiosk: Kiosk Utility for Grafana
youtube link for dell bios settings